Configuración del perfil
Cada usuario puede establecer sus preferencias en la Configuración del perfil. La configuración se aplica por usuario.
Es decir, los cambios que realices te afectarán sólo a ti:
- Reorganizar los elementos en tu barra lateral arrastrando y soltando
- Mover los elementos que rara vez usas a la sección Mostrar más
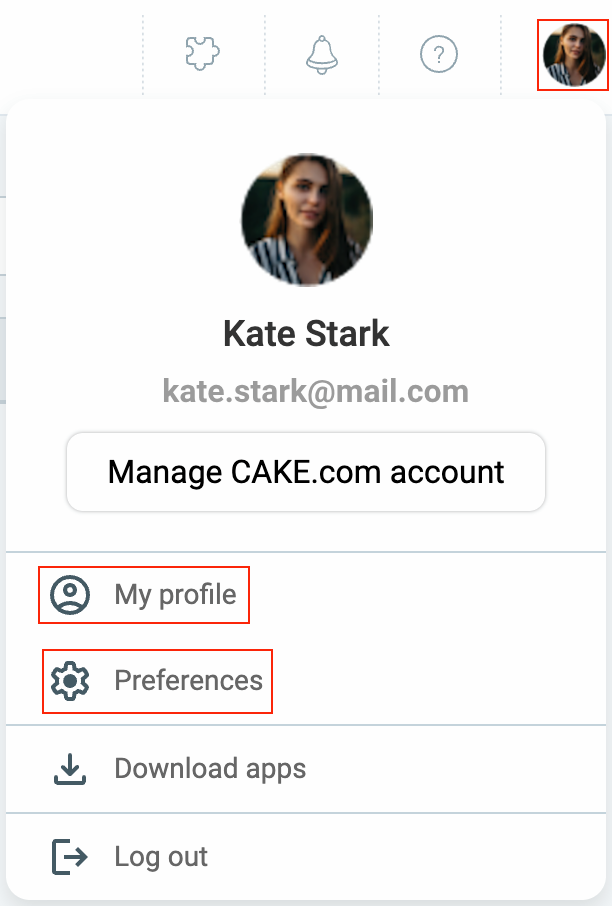
Accede a Configuración del perfil haciendo clic en tu perfil en la esquina superior izquierda.
En la Configuración del perfil, puedes elegir gestionar:
- Mi perfil
- Preferencias
Mi perfil #
Si quieres actualizar tu información personal, como tu correo electrónico, foto de perfil o nombre de usuario, puedes hacerlo directamente desde tu cuenta de CAKE.com. Simplemente haz clic en Gestionar cuenta de CAKE.com en la Configuración del perfil, y serás redirigido a la página de tu cuenta de CAKE.com donde podrás realizar todos los cambios necesarios.
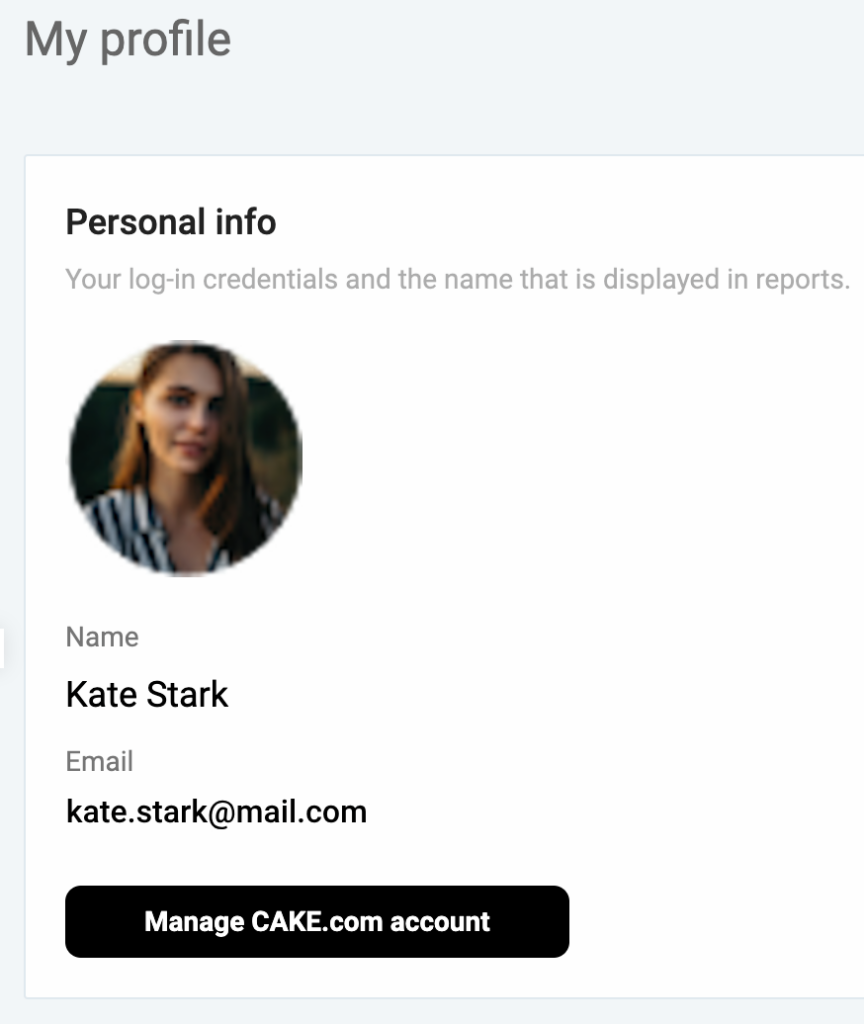
Cualquier actualización que realices se sincronizará automáticamente con tu espacio de trabajo de Clockify.
For more information on how to edit your profile, check out this page.
Preferencias #
En esta sección, puedes personalizar la configuración relacionada con la información de tu perfil, notificaciones por correo electrónico y acceder a configuraciones más avanzadas.
Gestiona las preferencias de tu perfil en una de las tres pestañas:
Configuración general #
Personaliza cómo usas la aplicación. Puedes elegir el tema de tu aplicación preferido, cambiar el idioma y ajustar otras configuraciones para facilitar tu trabajo.
Puedes modificar las siguientes preferencias:
- Temas: Cambia fácilmente entre temas oscuros y claros
- Idioma: Cambia el idioma de la aplicación
- Entradas de tiempo grupales: Elige agrupar entradas de tiempo similares o mantenerlas separadas
- Contraer lista de proyectos: Opta por hacer la lista de proyectos más compacta
- Filtro de tareas: Activa o desactiva el filtro de tareas para una mejor organización
- Configuración de tiempo: Personaliza configuraciones relacionadas con el tiempo como zona horaria, formato de fecha, formato de hora e inicio día
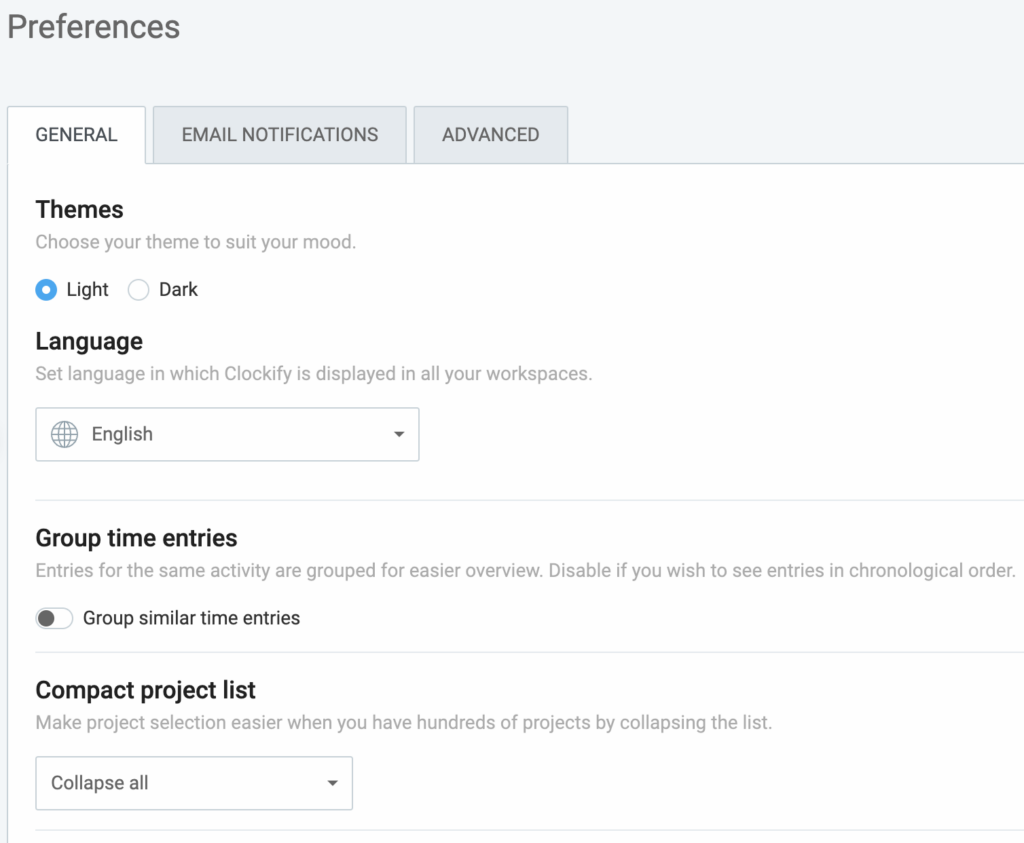
Para ajustar el inicio de semana de un usuario, edita su perfil en la página de Equipo.
Cambiar idioma #
Además de en inglés, también puedes usar Clockify en tu lengua materna (francés, alemán, ruso, español, portugués). Cambia el idioma de la interfaz en tu Configuración del perfil.
Si invitas a un nuevo usuario a tu espacio de trabajo, heredará tu configuración de idioma durante el registro. Puede cambiar eso si quiere.
Las aplicaciones de escritorio y móvil están en el idioma del sistema operativo (la configuración del perfil se aplica solo a la versión web).
Notificaciones por correo electrónico #
Controla qué correos electrónicos recibes de Clockify (boletín informativo, informe semanal personal y temporizadores de larga duración) eligiendo Preferencias de correo electrónico en la Configuración de perfil.
- Boletín informativo - Recibe un correo mensual sobre las nuevas funciones en Clockify.
- Incorporación - Recibe una serie de correos electrónicos sobre funciones y actividades clave al unirse a Clockify
- Informe semanal - Recibe un correo semanal sobre tus actividades de seguimiento del tiempo.
- Temporizador de larga duración - Recibe un correo electrónico cuando una entrada de tiempo se esté ejecutando durante más de 8 horas.
- Informes programados: Recibe los informes compartidos que has programado para enviar por correo electrónico
- Aprobación: Recibe un correo electrónico cuando se envíe, rechace, retire o apruebe una planilla de horarios
- Tiempo libre: Recibe un correo electrónico cuando se actualice el saldo, o se envíe, apruebe o rechace una solicitud de tiempo libre
- Alertas: Recibe un correo electrónico cuando un proyecto o tarea alcance un cierto porcentaje de su tiempo o presupuesto estimado
- Recordatorios: Recibe un correo electrónico cuando tú o tus compañeros de equipo falléis o superéis los objetivos de seguimiento del tiempo
- Planificación: Recibe un correo electrónico sobre tus tareas planificadas
Clockify todavía puede enviarte mensajes sobre tu cuenta, los anuncios de servicio requeridos, notificaciones legales y asuntos de privacidad.
Para recibir estas notificaciones por correo electrónico, debes tener un correo electrónico verificado y también verificar qué tipo de notificaciones te gustaría recibir en las Preferencias de correo electrónico.
Puedes darte de baja de cualquier tipo de correo que recibes haciendo clic en date de baja en la parte inferior de la pantalla.
Configuración avanzada #
Optimiza tu cuenta en la sección de Configuración avanzada section to improve security and efficiency. para mejorar la seguridad y la eficiencia. Encuentra opciones como la gestión de claves API y la configuración de webhooks.